
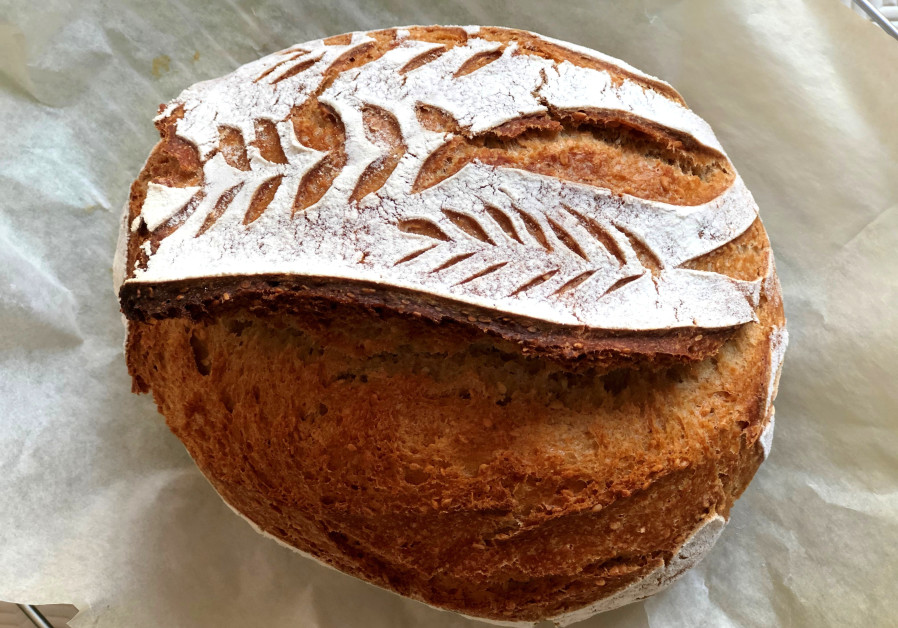
I absolutely love baking. In my opinion, the aromas that waft from your oven as you bake a cake carry with them feelings of warmth and caring. And when you bake savory pastries and breads, you are filled with a completely different type of feeling – one of creativity and a love of feeding and caring for your loved ones.Learn more about Pascale's Kitchen here>>Savory pastries and breads are extremely versatile and can be served at any point during a meal. More than any other type of dish, making pastries is a great way for you to express your creativity through unique flavors, textures and tastes. It’s amazing to see the magic that occurs as dough bakes and turns golden brown.Over the years, I’ve prepared countless cakes, cookies and bread for my family members and friends, including challot, rolls and bread made with a variety of flours and topped with a variety of seeds.I love hearing the sounds of enjoyment and seeing the big smiles on the faces of my friends and loved ones when they taste the treats I’ve prepared for them.My latest quest has been to learn how to make sourdough bread, and now I always keep a bit of sourdough starter in my pantry. Over the last year, as we’ve all been self-isolating at home due to the coronavirus, I’ve found myself numerous times in my kitchen experimenting with new techniques and recipes as I prepared dinner for my family.I’m always thinking to myself, What new creation can I concoct that I can then tell my readers about in my weekly column? For years, I’ve been telling myself that I’ll experiment with new ideas when I have the time. And, voila! This year I found myself with all the time in the world to try out recipes with ingredients I’d never used before.One of my most successful experiments has been decorating and scoring sourdough bread. I began by making one incision in the side of a loaf of dough. I was so surprised by the results that I couldn’t wait to try making more marks on more loaves of bread, including diagonals cuts. This was enough to set me off in search of bread scoring and decorative sourdough tutorials. Each loaf I baked came out tastier and with more sophisticated designs. It soon became clear to me that I would need to invest in a few utensils if I wanted to make more intricate designs. I went online and ordered a set of different-sized rattan dough baskets and sharp bread knives.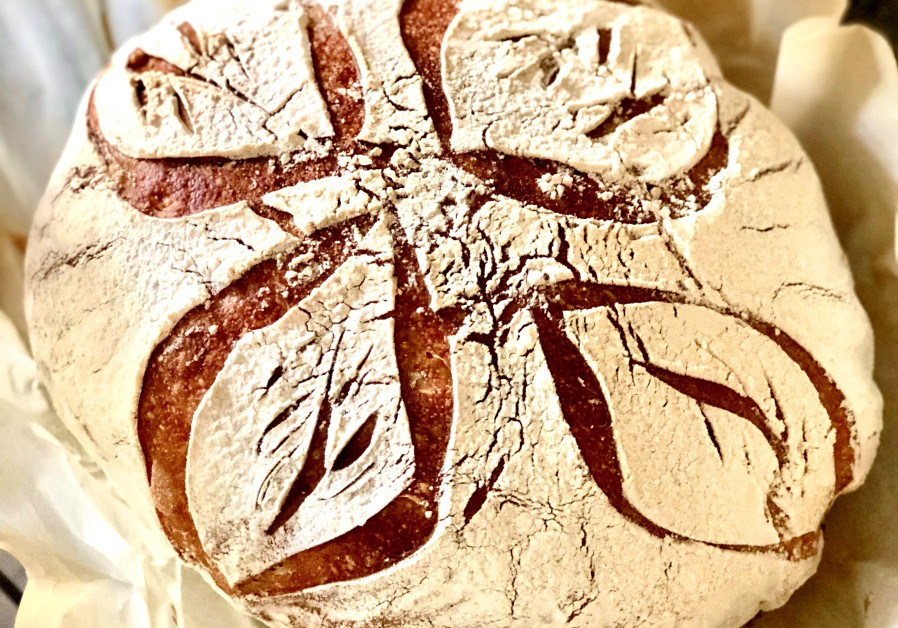
Makes 1 large or 2 small loaves.
80 gr. sourdough starter
1½-1¾ cups water
250 gr. bread flour, sifted
250 gr. white flour, sifted
1 Tbsp. salt
SOURDOUGH BREAD
Makes 1 large or 2 small loaves.
500 gr. white flour
200 gr. rye flour
150 gr. sourdough starter or rye sourdough starter
½ cup oat bran or ¼ cup ground flax seeds
½ cup sesame seeds
½ cup sunflower seeds
2½ cups water
1 Tbsp. salt
Wheat or corn flour for work surfaceAdd the flours and sourdough starter to the bowl of an electric mixer fitted with a dough hook and mix slowly. Add the bran and all the seeds, while mixing slowly. Add the water slowly while mixing.Mix for 3 minutes, then add the salt. Continue mixing for another 8-10 minutes. Flour a large bowl and place the dough in it. Cover with plastic wrap and let the dough rise for 60-90 minutes. Knead the dough well to get out all the air pockets. Fold the edges of the dough in toward the center. Cover and let rise again for 1 hour. Knead the dough again and then form 1 or 2 loaves. Let the dough rest on your work surface for 20-30 minutes. Place the dough in a basket lined with a towel or a cloth that is sprinkled with wheat or corn flour. Cover and place in the fridge for 12 hours. Place a baking stone or an iron pot inside your oven and preheat on maximum heat for 30 minutes. Place a sheet of baking paper on your work surface and sprinkle with flour. Put the loaf or loaves of dough on the paper and sprinkle with flour. Form whatever shape you desire with the loaves, and then make a few diagonal shallow slices on top of the loaf, or create any design you want. Remove the iron pot from the heated oven and, using the sides of the baking paper, lift the dough up and place it inside the pot. Cover the pot with its lid and bake at 250° for 20 minutes. Then, remove the lid and continue baking for another 15-20 minutes until the bread turns golden brown.Translated by Hannah Hochner.